The GeoTIFF format can be quite large in some instances so the ability to compress and lower the size of the file saves time while maintaining its original quality.
From a singleband raster GeoTIFF (i.e. rainfall, digital elevation model):
- Open QGIS (v2.18) and add your singleband raster GeoTIFF
- In the main QGIS window go to Raster > Conversion > Translate (Convert Format)…
- Complete the following fields:
- Input Layer: singleband raster GeoTIFF
- Output file: save to your working folder
- Creation Options: tick this on and select the “High compression” profile (do not use “JPEG compression” as this will alter your singleband raster pixel values)
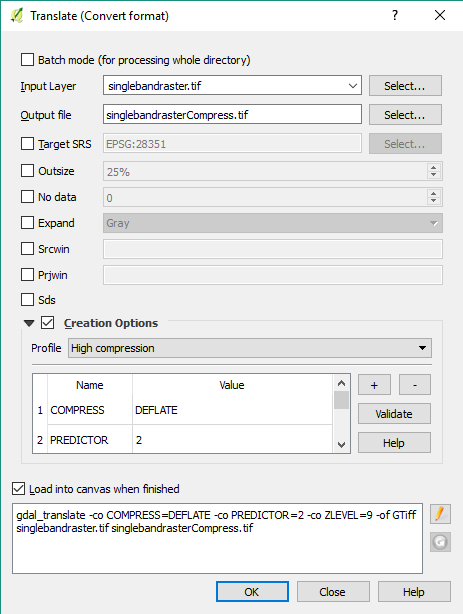
- This method usually compress the file size close to half of the original GeoTIFF size
- Follow section 4.01.6 to upload the compressed singleband raster GeoTIFF to GRID
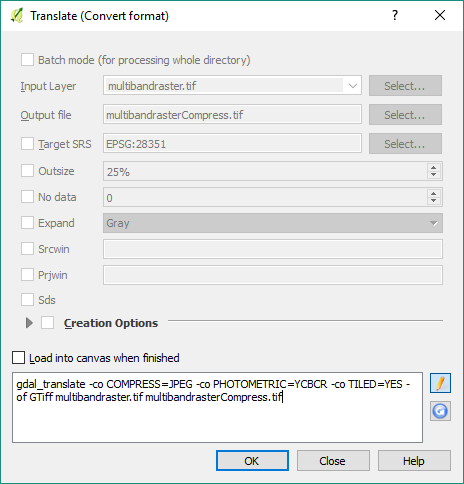
From a multiband raster GeoTIFF (i.e. satellite imagery, topographic map):
- Open QGIS (v2.18) and add your multiband raster GeoTIFF
- In the main QGIS window go to Raster > Conversion > Translate (Convert Format)…
- Complete the following fields:
- Input Layer: multiband raster GeoTIFF
- Output file: save to your working folder
- Click the “Edit” symbol
 and add in the following text after “gdal_translate”
- -co COMPRESS=JPEG -co PHOTOMETRIC=YCBCR -co TILED=YES
- -co COMPRESS=JPEG -co PHOTOMETRIC=YCBCR -co TILED=YES
From an ArcGIS grid raster to a multiband raster GeoTIFF (i.e. satellite imagery, topographic map):
- Open QGIS (v2.18) and add your ArcGIS grid raster
- In the main QGIS window go to Raster > Conversion > Translate (Convert Format)…
- Complete the following fields:
- Input Layer: ArcGIS grid raster
- Output file: save to your working folder
- Creation Options: tick this on and select the “High compression” profile (do not use “JPEG compression” as this will alter your grid raster pixel values)
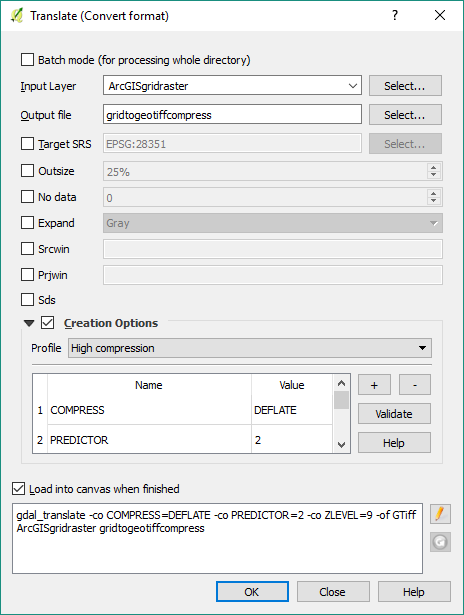
- This method usually compress the file size close to half of the original GeoTIFF size
- Follow section 4.01.6 to upload the compressed singleband grid raster GeoTIFF to GRID
Troubleshooting:
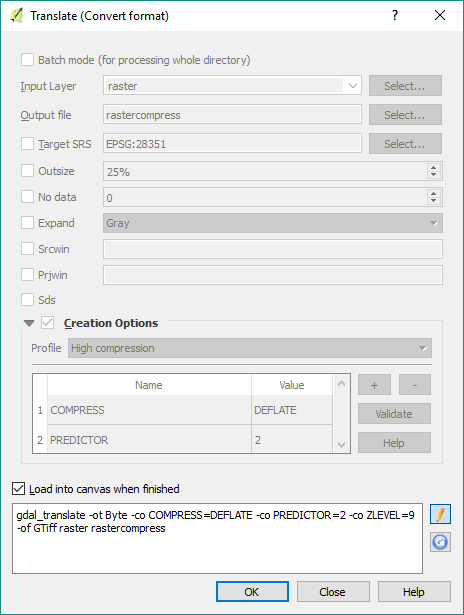
If your raster uploads successfully but does not display the most likely case is the raster is not in a compatible data type (i.e. 8-bit)
- Go back into QGIS and add your compressed raster
- In the main QGIS window go to Raster > Conversion > Translate (Convert Format)…
- Complete the following fields:
- Input Layer: compressed raster
- Output file: save to your working folder
- If your raster values are between 0-255 use the following method
- Creation Options: tick this on and select the “High compression” profile (do not use “JPEG compression” as this will alter your raster pixel values)
- Click the “Edit” symbol and add in the following text after “gdal_translate”
- -ot Byte
- -ot Byte
- If your raster values include decimals and/or negatives use the following method
- Click the “Edit” symbol and add in the following text after “gdal_translate”
- -ot Float64 -co COMPRESS=DEFLATE
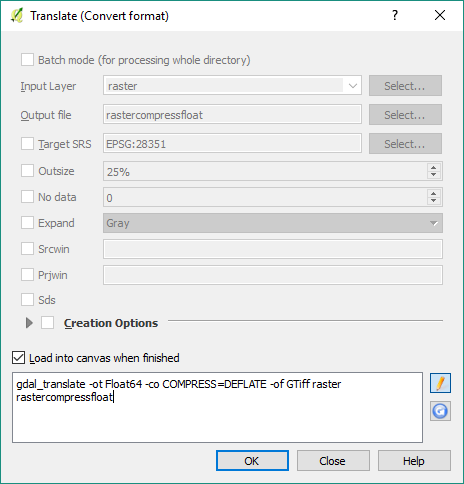
- -ot Float64 -co COMPRESS=DEFLATE
- Click the “Edit” symbol