An easy-to-use, online GIS for Natural Resource Management groups
2.03 Add data
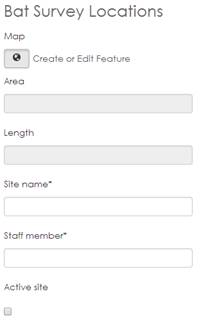
Ensure your Project and Activity is selected:
To start creating a feature click Create or Edit Feature.
Up to four additional icons will appear in the interactive map. The tools shown will vary depending on the activity type: DrawPolygon. Draw Line. DrawPoint and Modify Feature.
Select one of the draw tools to create a feature:
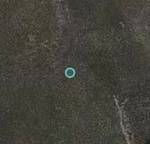
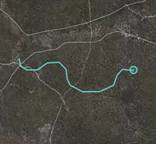
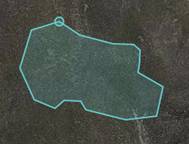
Start drawing by clicking on the map:
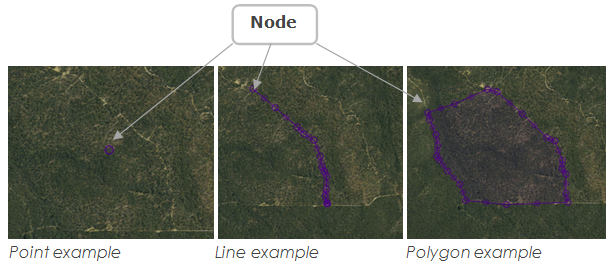
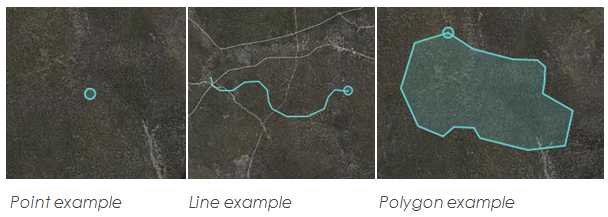
Point example Line example Polygon example
To draw freehand (i.e. not having to click once for each node) hold down the shift key, click and hold the left mouse button, and move around the map to create your feature.
Double click to complete the feature (if drawing a polygon or a line feature in non-freehand mode).
The feature will change to purple and nodes will display (nodes are indicated as circles on the map):
Click and drag a node to modify the shape of the feature.
To delete a node, click on it so it is highlighted, then press Delete on your keyboard.
To start again and clear the feature, click any tool.
Once the feature is complete, enter its attributes into the Activity Fields to the right of the interactive map:
To clear your feature and attributes and start again, click Clear at the bottom of the page.
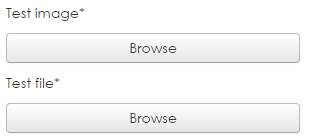
If there are ‘file’ or ‘image’ fields you can add documents, zip files or image files (.jpg/ .png) by clicking Browse, navigating to your file and clicking Open:
Once the feature is created, the attribute fields are populated and the associated files are attached, click Save.
If you enter the incorrect field type or forget to populate a mandatory field, you will receive a prompt “This field is required” (mandatory fields are indicated by a *):
Correct the error and click Save again.
Please note that saving may take several minutes to complete. Wait for the feedback that your activity has been saved successfully:
Once saved, the feature will change to blue – indicating it is selected:
To edit the same feature again, select Create or Edit Feature, make your edits, and click Save again:
To Delete the feature, click Delete.
To create a new feature for the same activity, click New (this will unselect the feature) and then Create or Edit Feature to start creating.


 Draw Polygon.
 Draw Line.
 Draw Point and
 Modify Feature.